Needlepoint Curly Hair With A Gathered Stitch

A gathered stitch can be an effective way of stitching curly hair or loops of animal wool.

The gathered stitch looks complicated, but it really isn’t. Here are some basic guidelines:

1. Use a Chenille needle – these have sharp points – because when you stitch a gathered stitch, you pierce the thread to gather up the stitch.

2. Use a twisted thread. If you use a single ply, or untwisted thread like embroidery cotton, you won’t have any spring in your curls!

3. Use a long thread so you don’t have to tie off and start again very often. Try to do the entire hair using one thread length (this may not be possible if it’s a large area).

How to do a Gathered Stitch

Thread the Chenille needle and bring it up from back to front of the canvas (at A), having secured it behind. You can start anywhere on the canvas as this stitch is not really worked in rows so much as the stitches are strategically placed – the closer together the stitches are,  the fuller the curls.

Next, pierce the thread at 3 points, about  1/8” – 1/4” apart.

needlepoint curly hair gathered stitch

Then, bring the needle down again in a hole adjacent to where you brought the needle up (at B). Pull the needle through, and your curl will sit nicely on top of the canvas.

Next, bring the needle up again in an adjacent hole and continue until you have covered the entire area.

Another way to stitch curly hair is to use a French Knot – the effect is a tighter curl.

needlepoint curly hair French knots


Posted in Uncategorized | Leave a comment

Five Needlepoint Tips for Beginners

So, you’ve mastered the basics of needlepoint and are well on your way. Here are a few needlepoint tips that might improve your stitching experience.

1. Travel your thread under stitches on the back of the canvas.

Now, we’re not naming names (although we have given them to the ‘needlepoint police’), but sometimes we see canvases where the stitcher has traveled the threads over the back of the stitches on the reverse.  If you want the back of your needlepoint to look neat and tidy, and more like the front of your needlepoint, travel your threads under the stitches on the back of the canvas. And if you have more than about an inch to travel, snip off and start again – come on now, don’t be lazy.

2. Learn how to alternate your stitch direction so you don’t have to turn your canvas.

Do you stitch along a row, and when you get to the end of the row, turn your canvas upside down so you can stitch in the same direction on the reverse row? Try practicing not turning your canvas. If you can learn to alternate your stitch direction (thread going up and to the right when stitching in a left direction; thread going down and to the left when stitching in a right direction), your stitching will move along faster and not be as cumbersome.

3. Thread multiple needles before you start.

You already have your needle threader out (or your magnifying glass in hand), why not thread several needles at once? Thread different colors for quick color changes, or just thread up multiple needles with the same color. Act like a factory  and do one process at a time (Okay, forget the factory analogy; that makes stitching sound like a chore).

4. Keep an ort jar nearby for the thread pieces.

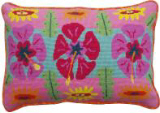
This one’s for me! If you picked up the cushion on my stitching chair (don’t worry, I never intend to), you would find a bird’s nest of thread snippets. So, don’t be like me, start an ort jar and put all your leftover threads into it.

Here are all the suggestions our wonderful readers came up with  for using these leftover pieces of thread.

5. Place a piece of fabric on your lap.

I can’t tell you how often I walk around with thread pieces stuck to my clothing. But now I’m a changed woman. Next to my ort jar I keep a piece of fabric that I place on my lap before I stitch. It catches all the fluff and thread pieces that don’t make it into the ort jar. Also, if you are stitching with a dark thread, and finding it hard to see, place a light colored fabric on your lap. It will make a huge difference.

Posted in How to Needlepoint, Needlepoint Techniques | Tagged , | Leave a comment

Needlepoint Darning Stitches Book – A Review


We seem to be on a roll with book reviews (if two can be considered “a roll”).

It Is About Darn Time – By Sharon G

This new book by Sharon G, all about darning stitches, is a great resource for anyone interested in using open stitches on their canvas. And, open stitches are “hot” in needlepoint right now.

What We Like About This Book:

  • It’s more pictures than words. The graphic illustrations are really, really good. They are large, covering about half of each page, and you can clearly see the direction your thread needs to travel and over how many canvas intersections. Good images are much easier to follow than a bunch of words, and this book is big on graphics.
  • It’s reassuring. Open stitches can seem daunting if you haven’t tried them before: how to secure your thread, where to start, what pattern to choose. This book has over 125 stitches to choose from, with a few lines about each stitch and how it might best be applied, and only 1 or 2 pages on general darning tips. You would think this might be a bad thing – where are all the other instructions? – but I actually found it reassuring. Even I can read a page and a half of general instructions before I launch into some darning stitch practice. It makes these stitches very accessible to novice and expert stitchers alike.
  • The stitch patterns are varied; from open lace patterns, to motifs like stars, bells, wine glasses and dog bones. There truly is something here for every canvas.

Any Negatives?

  • Not really. This is a soft cover book, so at $46 it may seem expensive, however, I actually think it’s good value for the number of stitch patterns included, the quality of the paper and binding, and the large size graphics.
  • It doesn’t have an index at the back and this may have been a useful addition.
  • There are no illustrations/photographs of finished designs; I suspect due to printing costs as it is printed in 3 colors.
A dog bone darning stitch.

Once again, a great stitcher’s resource and all you need to get darning.

Posted in Needlepoint Styles, Needlepoint Techniques | Tagged , , | Leave a comment

Spice Up a Plain Needlepoint

Stitching Basic Designs Without Boredom

Sometimes you might come across a needlepoint design that you love, but you don’t feel like stitching it because there’s not enough “going on” on the canvas – funny sayings might be an example.

Here are a few ideas for spicing up a stitching experience, on a canvas that has only a few colors, or minimal technical details. Canvases like these…

With a bit of imagination you can turn this…

Keep Calm and Love Dogs.
11″ x 8″ on 13 mesh.

into this…

These ideas can be applied to any basic needlepoint canvas:

1. Use Fun Threads.

Velvets, metallics, sparkles, the choice is mind-boggling. Choose an interesting thread to stitch: all the letters; the first letter of each word; a word that you want to make stand out; a motif. Think of how you can incorporate a fun fiber without making the overall stitched design look overloaded. Remember, less is more with most boutique fibers.

2. Use Beads.

Here, tiny beads were used to stitch all the lettering. Some of us (myself included) may not have the patience for this amount of beading, but what about one or two strategically placed beads on the canvas, like this heart?

3. Use a Darning Pattern for the Background.

Whole books have been written about darning patterns, and you can also make up your own? This dog bone darning pattern has been repeated across the background of the canvas –  Nothing boring about that!

A darning stitch is just a running stitch repeated in a pattern, row by row. The American Needlepoint Guild explains it nicely and has a page of examples here. You could create a pattern for a heart for this canvas, or an ice cream cone for the Did I Eat That? canvas. Endless possibilities when you use your imagination.

4. Use a Different Stitch for the Border.

You could “border” the design using something like a Cashmere Stitch or a Scotch Stitch.

Cashmere Stitch Scotch Stitch

We hope these few ideas for how to approach a basic canvas have inspired you to take a fairly simple design and turn it into a work of art (or something!).

Posted in How to Needlepoint, Needlepoint Styles, Needlepoint Techniques | Tagged , , , | 1 Comment

The Needlepoint Book – A Review

It’s finally arrived; the latest edition of what is widely considered to be the needlepoint “bible”, The Needlepoint Book (3rd ed.) by Jo Ippolito Christensen.

I have not read this book cover-to-cover, and I probably never will. That’s because it’s not that sort of book. Think of The Needlepoint Book as an encyclopedia; a reference manual that you go to when you need information about something. Having said that, there are some chapters that you will want to read in full, and I’ll mention these in a bit.

This edition is a hardcover which pushes the price up (the MSRP is $60 and we are selling it for $49.50.). However, I think the hardcover is well worth it, because this book will be thumbed through for years. My 2nd edition fell apart a long time ago and is cobbled together with three varieties of duct tape. The 3rd edition is a well-bound book that opens flat for easy reading, and should stick around for awhile. Also, with purchase of the book you can download an iPhone or Android app. I haven’t tried this, yet, but it could be useful, (especially for the Stitches section) to have this reference on a small device by your stitching chair.

What I Like About This Edition:

  • It’s updated layout and new photos are accessible and easy to read. There are lots of color photographs of stitched projects, and I always find these helpful for getting stitch ideas.
  • There’s a section on fibers and this includes many of the latest ones. It doesn’t go into great detail, or cover everything, but I suspect this is because the fibers available on the market change so much from year to year, so if too much real estate was devoted to them, the book would date in a hurry.
  • I would buy the book for Chapter 7: Choosing Stitches, alone. This is the hardest thing to do when confronted with a new needlepoint canvas, and it is also the question we get asked more than any other – “What stitch would look good here?”. Chapter 7 gives you some good groundwork and theories from which to approach this. It’s a goldmine, right there.
  • There are more stitches in this edition and the illustrations are better. Also, the tools and materials section has been updated, so you can see what’s current in the way of gadgets.
  • If you are into openwork, and I suspect the author of this book is into it in a big way, then there is a chapter devoted to it, and a lot of the illustrations have openwork stitches in them. Open stitches have become very popular, and they can be tricky to get your head around (I haven’t), so Chapter 23 is a good hand-hold for dipping your toe into the open stitches arena.
  • There is a new chapter on ribbon stitches, also a popular area in recent years, with many new ribbon threads on the market. Chapter 22 nicely outlines stitches that are unique to ribbon stitching. This is a very relevant and well-timed addition to the book.
  • Lots of summaries, tables and charts are included which is an effective way of presenting a lot of information.

What I Didn’t Like About This Edition:

Not much, I have to say. I would like more color photos, but then it would be a $90 book, so I get why it is what it is. I think my biggest complaint would be the supporting notes to the stitches. These were thin in the second edition, and although they have been expanded upon in this 3rd edition, to my mind, more notes about each stitch: where to place them, things to watch out for etc, would have been useful. However, this edition is still an improvement in this area and I am probably just being “needy”.

The Needlepoint Book (3rd ed.) by Jo Ippolito Christensen will teach you how to stitch the simplest of canvases, beautifully, if you are a beginner, and it will take your level of expertise at least one notch higher if you already have a wealth of needlepoint knowledge. This is truly a soup-to-nuts book that is well-executed and an essential stitcher’s library addition. If only there was more time in a day…

Thanks for reading and HAPPY STITCHING.

Posted in How to Needlepoint, Needlepoint Accessories | Tagged , | Leave a comment

Needlepoint Round Bargello Stitch – Easy and Classy

Round Bargello – A Stitch With A Twist

For quite awhile now I have been wanting to stitch this canvas…

Flower on Stripes handpainted canvas.

… and looking for some inspiration to get started on it. I wanted to do something different, something that would make me look forward to siting down with this at the end of a busy day.

Then I saw the Round Bargello Stitch in a book and I thought, “Aha, now that looks like it might be fun.”

And I can tell you, it really is.

The Round Bargello Stitch is one of those stitches that forms a design on the canvas where there is no design on the canvas! The stitch is the design. So, it’s perfect for large(ish) geometric spaces and backgrounds. I tried it on the central orange band of this canvas and I was really pleased with the results.

This is one of my favorite type of stitches; it’s a stitch that makes you look like you’ve been around the proverbial stitching “block” a time or two, and you know what you’re doing, even if you’re really just starting out.  Once you have tried just one section of this stitch you should have the hang of it, and it flows quickly and easily from there.

Here’s how this stitch works. If you follow this diagram…

It is worked in four sections. Using the black numbers as a guide, I stitched this in 1,2,3,4 order, but I’m sure you don’t have to. So, I started at the top right of the canvas area (the red section) and, using the blue numbers as a guide, I stitched these Bargello stitches, to the bottom of the red section and then moved onto the right side of the blue area and completed that section, and so on.

The Bargello crosses 5 stitch intersections and each section is 16 long stitches.

When you have finished one Round Bargello stitch you then stitch all the adjacent ones until you have filled your area. The stitch is easy to compensate as you go, as you just fill the spaces you have, reducing the stitch length as you need to.

When the “spirals” are complete you’ll have some gaps to fill in. I filled these in with a basketweave because I thought this would best showcase the spirals. But, you could fill in with other stitches if you want to.

Try the Round Bargello stitch next time you’re looking for a pattern stitch to fill an area. Like I said, it really is easier than it looks. I used silk and the high sheen thread, combined with the spiral nature of the stitch, reflects light at different angles and gives the stitch some nice movement and luxuriousness.

Thanks for reading and HAPPY STITCHING.

Posted in How to Needlepoint, Needlepoint Techniques | Tagged , , | Leave a comment

How To Needlepoint A Face

Faces can be hard to needlepoint so that they look realistic. you will need to adapt to each situation but here are some key tips when stitching a face onto a needlepoint canvas.

1. Use a Tent Stitch.

Using a tent stitch is usually the best way to needlepoint a face. There are very few situations where a better result might be achieved by using an alternate stitch; maybe if the face was a large part of the design then using a Satin Stitch might allow for multi-directional stitches and the play of shadows on the face.

2. Blend Colors.

A needlepoint face is almost always improved by blending colors. Faces have planes, shadows and ridges, and when the area you are stitching is small these details are best brought out with shading. So, even if your needlepoint canvas is not printed or painted with shading on the face, think about how you might apply subtle color changes to enhance these details. For example, use a few stitches of a slightly darker/pinker shade to highlight a cheek bone. Similarly, consider where the shadows might fall on the face you are stitching and apply a slightly darker shade in these areas. For example, this might be around the inner eye, around the nose and under the chin. You can blend threads of different colors in the needle to get subtle color gradations (if your thread is stranded) or you can purchase threads in different shades and strategically apply them.

Use subtle color changes to needlepoint a complexion.

Use subtle color changes to needlepoint a complexion.

3. Use Top Stitching.

Don’t forget top stitching when you needlepoint a face. Some features may look better stitched in afterwards as top stitching. These could be the outline of the eyes; perhaps defining a nose and chin; some subtle wrinkles; eyebrows. Consider all of the elements of the face and think about which, if any, you might want to apply later over a tent stitched base using a single, thin strand of thread as a backstitch or other form of top stitching.

Use top stitching to bring out the detail in a needlepoint face.

Use top stitching to bring out the detail in a needlepoint face.

4. Consider Using Metallics.

Metallics have their place when you needlepoint a face. It’s hard to imagine that a metallic thread would have any business being stitched onto a face, but there is one instance in which a stitch or two of a carefully chosen metallic, or other high sheen thread, might be called for – and that is in the eyes. We are only talking a stitch, or two, but the reflective quality can add “life” to the eyes and face.

We hope you have found these ideas for how to needlepoint a face useful. Let us know if you have tips of your own you would like to share.


Posted in Uncategorized | 2 Comments

Using Variegated and Overdyed Needlepoint Threads

What is the difference between a variegated and overdyed thread in needlepoint?

A variegated thread, which may also be called a semi-solid, has been factory-dyed varied tones of the same color. For example, if you look at a blue variegated thread, you will see the blue color goes from light to dark, over and over again, in even bands (e.g. three inches) along the thread. So there might be three inches of very light blue, followed by three inches of slightly darker blue, all the way up to a dark blue, and then these bands are repeated.

An overdyed thread is one that has been dyed over an existing color, and it is usually done by hand. This means the color variations are more random and unevenly spaced, and the colors need not be from the same group e.g. red may be over-dyed onto an orange thread. The colors that are overdyed could be contrasting or subtle.

Most fiber manufacturers produce a variegated and/overdyed selection. DMC, for example, has 18 variegated and 36 overdyed (called Color Variations) cottons.

DMC Variegated Threads DMC Overdyed Thread
(Called Color Variations)

Tips For Stitching With Variegated and Overdyed Threads

The thing you need to keep in mind when stitching with these threads is that if you stitch in a straight line they will form stripes, or bands. This can be an effect you want, or it can turn out to be an effect you don’t want.

If you are stitching a tree trunk, for example, a vertical “stripe” or bands of subtly changing color can give your tree an appropriately organic and realistic look. So a good use for a variegated or overdyed thread? Yes, absolutely, but only if you place the stitches in vertical columns; otherwise you will get horizontal bands and this could look odd.

Similarly with sea and sky. Who, outside of perhaps Arizona or California, ever sees an evenly blue sky? There are subtle color variations in most elements of nature and this is where overdyed and variegated threads can be used to their best effect. But you would want to stitch the sea or sky in horizontal lines (Continental stitch) and not basketweave, which will give you diagonal/oblique bands of color.

A variegated thread stitched in horizontal lines for sky. (Mary Self Daisy Chain small needlepoint kit).

So, you need to pay attention to the direction you are laying down your stitches.

The other effect you can get with variegated and overdyed threads is a mottled or speckled effect which can also look very organic if you think about how you place your stitches. If you want your color variations to look random and speckled, then you need to place your stitches randomly. This might be a good way of stitching fur, or landscape features (grassy hills?). Place a stitch every 3 or 5 or 4 holes and then go back and fill in the spaces randomly. It will mean your canvas is a bit of a mess on the back (cue the sirens from the “needlepoint police”), but you will have a nice, subtly changing color variation on the front of your canvas.

Alternatively, you can “clump” the stitches together to get clumps of color on your canvas, which might look like tweed (clump in squares), or groves of trees on distant hills if you clump in roundish groups of stitches.

Not All Variegated Threads Are The Same

Try to match the variegated or overdyed thread to the area you are stitching. Some threads will have more subtle color changes than others. For example, most things in nature will be variegated within the same color family e.g. shades of green, and so a subtle variegated thread would be a good choice to get realistic shading in this instance. Other overdyes might have quite contrasting colors e.g. grey on white. This would look strange on something that is quite even in color in reality, but an object like a carpet or outdoor path might look effective stitched in a less-subtly contrasting thread.

Do you get the idea that you need to play around a bit with variegated and overdyed threads? Inspect how the color changes on the thread and decide how you will lay it on the canvas. Then wait and see what it looks like because it’s hard to know in advance. Hopefully you will like it; and certainly, with experience you will get a ‘feel’ for the effects of variegated threads.

A Note About Cross Stitch

If you are stitching a Victorian Cross Stitch in needlepoint then it is customary to complete both arms of the cross at once before moving on to the next stitch (as opposed to traditional cross stitch where you stitch a half cross along the row and then reverse back along that row to complete the top arm of the cross). This needlepoint method will give you a striped effect if you are using a variegated or overdyed thread, and if you do not want this effect then you are better served using the traditional cross stitch method whereby the half stitch placed over the top will be a more random shade to the one underneath and will give you a mottled effect.

Posted in Needlepoint Accessories, Needlepoint Techniques | Tagged , , | Leave a comment

Needlepoint Pillow Kits

I love Jonathan Adler’s needlepoint pillows – he is truly a style icon – but I always think that people would have more fun if they could stitch the needlepoint pillow themselves.

There are plenty of needlepoint pillow kits on the market today that don’t feature cute poodles or English country cottages.

Jennifer Pudney needlepoint pillow kit

Hibiscus needlepoint pillow kit by Jennifer Pudney.

Take the designs of New Zealand needlepoint designer Jennifer Pudney. This Hibiscus needlepoint pillow kit is an example of a bright, fresh design that would enliven any beach house or sun room. And when you’ve stitched it yourself, you get to say it’s homemade.

Garden Gnomes needlepoint pillow kit

A retro needlepoint kit by Kirk & Hamilton – Garden Gnomes.

London based designers Kirk & Hamilton have recently come out with some retro-cool needlepoint pillow kits. If your garden gnomes keep getting stolen, perhaps you could stitch them for posterity instead.


Needlepoint pillow kit

An elegant needlepoint pillow stitched by hand.

Or if you like your decor to be less playful and more about elegance then there are plenty of options in needlepoint pillow kits and handpainted needlepoint canvases.


The point is, needlepoint is no longer boring and is very much in style. You can combine style with relaxation and job satisfaction by stitching these needlepoint pillows yourself.

And, if all else fails you can stitch this:

Keep Calm and Carry On needlepoint


Posted in Needlepoint Kits, Uncategorized | Tagged , , , , | Leave a comment

Jennifer Pudney Needlepoint Pillow Kit – Hibiscus

Jennifer Pudney Needlepoint Pillow Kit - Hibiscus

Jennifer Pudney Needlepoint Pillow Kit – Hibiscus

Posted in Uncategorized | Leave a comment